That little ding in your car door – it's like an unwelcome guest that just won't leave. You see it every time you approach your vehicle, a constant reminder of that rogue shopping cart or clumsy encounter in the parking lot. It might seem minor, but it can be surprisingly irritating!
Let's be honest, taking your car to a professional body shop for a small dent can feel like overkill. The cost, the hassle of dropping off and picking up your car, and the feeling of being without your transportation for a few days… it all adds up to a less-than-ideal experience. You start wondering if there's a better way, a way to tackle that little imperfection without breaking the bank or disrupting your routine.
This guide is for the everyday car owner who wants to take a crack at fixing minor dents at home. We'll walk you through some common DIY techniques, discuss the tools you'll need, and help you assess whether a DIY approach is right for your situation. We're focusing on those small, shallow dents that don't involve paint damage, and we'll provide tips and warnings to help you avoid making things worse.
In this article, we'll explore DIY dent repair methods, focusing on techniques like using a plunger, hairdryer and compressed air, and even specialized dent pullers. We'll delve into the tools required, the potential risks involved, and how to determine if a DIY fix is appropriate for your dent. We aim to empower you with the knowledge to confidently assess and potentially repair minor dents at home, saving you time and money while maintaining your car's appearance. We will discuss minor dent fixes, DIY car repair, auto body repair, and paintless dent repair (PDR).
Understanding the Limitations of DIY Dent Repair
The target of this section is to set realistic expectations for readers considering DIY dent repair. It aims to clearly define the types of dents that are suitable for home repair versus those that require professional attention. This helps readers avoid wasting time and potentially damaging their vehicles further.
I remember the first time I tried to fix a dent myself. It was a small, almost imperceptible ding on the rear quarter panel of my old pickup truck. I'd watched a few videos online and thought, "This looks easy!" I grabbed a plunger, some hot water, and went to work. After about an hour of plunging and re-heating, I managed to make… absolutely no difference. In fact, I think I might have even made it slightly worse! That experience taught me a valuable lesson: DIY dent repair has its limits.
The truth is, not all dents are created equal. Minor, shallow dents that don't involve creasing or paint damage are the best candidates for DIY fixes. Think of those annoying little dings you get from shopping carts or careless door swings. These types of dents often respond well to techniques like using a plunger, hairdryer and compressed air, or even specialized dent pullers designed for at-home use. However, if the dent is deep, has sharp creases, or has damaged the paint, you're likely better off leaving it to the professionals.
Trying to fix a complex dent without the proper tools and expertise can easily lead to further damage. You could stretch the metal, crack the paint, or even compromise the structural integrity of the panel. Remember, a professional body shop has specialized tools, years of experience, and a deep understanding of metalworking. They can assess the damage accurately and use the appropriate techniques to restore your car to its original condition. So, before you dive into a DIY project, take a close look at the dent and honestly evaluate your skills and the potential risks involved. It's always better to be safe than sorry!
Essential Tools and Materials for DIY Dent Repair
This section targets readers who are ready to attempt DIY dent repair. It provides a comprehensive list of the tools and materials they'll need, along with guidance on selecting the right equipment for different types of dents. This ensures readers are well-prepared before they start the repair process.
So, you've assessed the dent, determined it's a good candidate for a DIY fix, and now you're wondering what you'll need. Don't worry, you don't need to invest in a full-blown auto body shop! For most minor dent repairs, a few basic tools and materials will suffice. Here's a rundown of the essentials:
- Plunger: A simple cup plunger (not a flange plunger) can be surprisingly effective for pulling out shallow dents on flat surfaces.
- Hairdryer and Compressed Air: This combination works on the principle of thermal expansion and contraction. The hairdryer heats the metal, causing it to expand, and then the compressed air rapidly cools it, causing it to contract and hopefully pop back into place.
- Dent Puller Kit: These kits typically include a glue gun, glue tabs, and a bridge-style puller. You glue a tab to the center of the dent, attach the puller, and gradually pull the dent out.
- Rubber Mallet and Block: These are useful for gently tapping the metal back into shape after using other techniques.
- Clean Cloths: Essential for cleaning the area before and after the repair.
- Spray Bottle with Water: Helpful for lubricating the area when using a plunger or rubber mallet.
When choosing your tools, opt for quality over cheap imitations. A flimsy dent puller or a poorly made glue gun can actually make the problem worse. Read reviews, compare prices, and invest in tools that will last. Remember, proper tools not only make the job easier but also reduce the risk of causing further damage to your car.
The History and Myths of DIY Dent Repair
The target here is to entertain and inform readers by exploring the evolution of DIY dent repair techniques and debunking common misconceptions. This adds context and credibility to the guide, making it more engaging and trustworthy.
Believe it or not, the concept of DIY dent repair isn't new. In fact, people have been trying to fix dings and dents on their cars for as long as cars have existed! Early methods were often crude and involved a lot of guesswork. Think hammers, wooden blocks, and a whole lot of elbow grease. As technology advanced, so did the techniques for DIY dent repair.
One common myth is that you can use dry ice to pop out dents. While the rapid temperature change might seem like a good idea in theory, in practice, it's often ineffective and can even damage your paint. Another myth is that you can simply heat the dent with a torch and it will magically pop back into place. This is a recipe for disaster! Excessive heat can warp the metal and ruin the paint job.
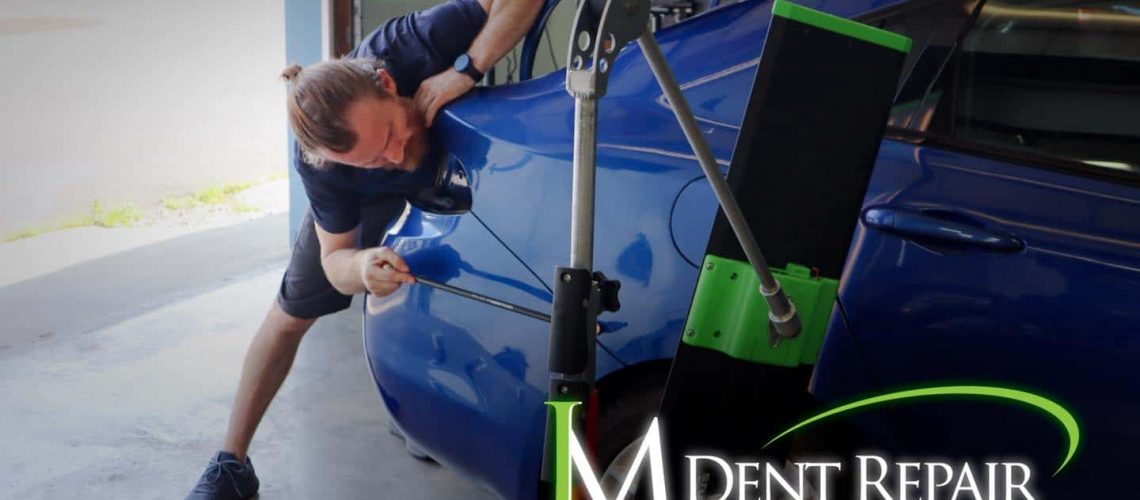
The rise of paintless dent repair (PDR) in the late 20th century revolutionized the industry. PDR involves using specialized tools to massage the metal back into its original shape from behind the panel, without damaging the paint. While PDR is typically performed by professionals, some of the basic principles have been adapted for DIY use, such as using dent puller kits. Today, countless online tutorials and forums offer advice on DIY dent repair, but it's important to separate the fact from the fiction. Always do your research, proceed with caution, and remember that some dents are best left to the experts.
Unveiling the Hidden Secrets of DIY Dent Repair
This section aims to provide readers with insider tips and tricks that aren't commonly shared in basic DIY guides. This makes the guide more valuable and empowers readers with advanced knowledge to improve their chances of success.
While the basic techniques of DIY dent repair are relatively straightforward, there are a few hidden secrets that can make a big difference in your results. One often overlooked secret is the importance of patience. Don't rush the process! Whether you're using a plunger, hairdryer, or dent puller, take your time and work slowly and methodically. Applying too much force or pulling too quickly can easily lead to further damage.
Another secret is to use the right technique for the specific type of dent. A plunger might work well on a shallow dent on a flat surface, but it's unlikely to be effective on a crease or a dent near an edge. Similarly, a dent puller kit might be suitable for a small, rounded dent, but it's not the best choice for a large, complex dent. Experiment with different techniques and see what works best for your situation.
Finally, don't be afraid to seek advice from others. There are countless online forums and communities dedicated to DIY auto repair. Ask questions, share your experiences, and learn from the mistakes of others. You might be surprised at the wealth of knowledge and support available online. Remember, DIY dent repair is a skill that improves with practice. Don't get discouraged if your first attempt isn't perfect. Keep learning, keep experimenting, and you'll eventually master the art of fixing minor dents at home.
Recommendations for Choosing the Right DIY Dent Repair Method
The target is to provide readers with a clear framework for selecting the most appropriate DIY dent repair method based on the size, shape, and location of the dent. This helps readers avoid wasting time and resources on ineffective techniques.
With several DIY dent repair methods available, how do you choose the right one for your specific situation? Here's a breakdown of recommendations based on different types of dents:
- Small, Shallow Dents on Flat Surfaces: A plunger is often the simplest and most effective solution for these types of dents. Simply wet the area with water, apply the plunger firmly, and pull with a steady motion.
- Small, Rounded Dents: A hairdryer and compressed air can work wonders on these dents. Heat the area with the hairdryer for several minutes, then quickly spray it with compressed air. The rapid temperature change can cause the metal to pop back into place.
- Slightly Larger or More Stubborn Dents: A dent puller kit is a good option for these types of dents. Follow the instructions carefully and be patient. It may take several attempts to pull the dent out completely.
- Dents Near Edges or Creases: These dents are more challenging to repair and often require a combination of techniques. You might try using a rubber mallet and block to gently tap the metal back into shape, or you might need to consult a professional.
Before you start, carefully assess the dent and consider its size, shape, location, and depth. Also, think about your skill level and the tools you have available. If you're not comfortable with a particular technique, or if you're unsure whether it's appropriate for your dent, it's always best to err on the side of caution and consult a professional.
Safety Precautions to Take During DIY Dent Repair
The target is to emphasize the importance of safety when performing DIY dent repair. This section provides readers with essential safety guidelines to protect themselves and their vehicles from potential harm.
Safety should always be your top priority when attempting any DIY auto repair, including dent repair. Here are some essential safety precautions to keep in mind:
- Wear Safety Glasses: Protect your eyes from flying debris or splattered glue.
- Wear Gloves: Protect your hands from hot glue, sharp edges, or chemicals.
- Work in a Well-Ventilated Area: If you're using any chemicals or solvents, make sure you have adequate ventilation to avoid inhaling harmful fumes.
- Disconnect the Battery: Before working on any electrical components, disconnect the car battery to prevent accidental shocks.
- Use Caution with Heat: When using a hairdryer or heat gun, be careful not to overheat the metal or damage the paint.
- Don't Overexert Yourself: Take breaks if you're feeling tired or frustrated. Working when you're fatigued can lead to mistakes and injuries.
Always read and follow the instructions that come with your tools and materials. If you're not sure how to use a particular tool safely, consult a professional or watch a tutorial video. Remember, your safety is more important than saving a few dollars on a dent repair. By taking the necessary precautions, you can protect yourself from harm and enjoy the satisfaction of fixing your car yourself.
Advanced Techniques for Stubborn Dents
This section targets experienced DIYers who are looking for more advanced techniques to tackle challenging dents. It provides detailed instructions and tips on using specialized tools and methods to achieve professional-quality results.
So, you've tried the basic techniques, but that stubborn dent is still hanging around? It might be time to explore some more advanced methods. One option is to use a heat gun in combination with a cold pack. The heat gun softens the metal, while the cold pack rapidly cools it, creating a stronger thermal shock that can pop the dent out.
Another advanced technique involves using a slide hammer dent puller. This tool provides more pulling power than a standard dent puller kit and is often used by professionals. However, it's important to use caution when using a slide hammer, as it can easily damage the metal if used improperly.
Finally, you can try using a specialized dent repair tool called a "glue puller." This tool uses a strong adhesive to attach a puller directly to the dent, allowing you to apply precise pressure and pull the dent out without damaging the paint. Glue pullers come in various sizes and shapes, so you can choose the one that's best suited for your specific dent.
Tips for a Perfect DIY Dent Repair Finish
The target is to provide readers with practical tips and tricks to achieve a flawless finish after completing the dent repair process. This includes techniques for smoothing out imperfections, blending the repaired area with the surrounding paint, and protecting the repaired area from future damage.
Even if you've successfully pulled out the dent, you might still notice some minor imperfections in the repaired area. Here are some tips for achieving a perfect finish:
- Use a Rubber Block and Mallet: Gently tap the repaired area with a rubber block and mallet to smooth out any bumps or ridges.
- Use a Polishing Compound: Apply a polishing compound to the repaired area to blend it with the surrounding paint.
- Apply Wax: Apply a coat of wax to protect the repaired area from future damage and to give it a glossy shine.
- Inspect the Repair in Different Lighting Conditions: Look at the repaired area in bright sunlight and in the shade to ensure that you haven't missed any imperfections.
If you're not satisfied with the results, don't be afraid to seek professional help. A professional body shop can use their expertise and specialized tools to achieve a flawless finish. Remember, the goal is to restore your car to its original condition, so don't settle for anything less than perfect.
Fun Facts About Dent Repair
The target is to entertain readers with interesting and little-known facts about dent repair. This adds a fun and engaging element to the guide, making it more memorable and enjoyable.
Did you know that the art of paintless dent repair (PDR) originated in the automotive factories of Europe in the 1950s? Factory workers developed techniques for removing minor imperfections from newly manufactured vehicles without damaging the paint. These techniques were later refined and adapted for use in the aftermarket repair industry.
Another fun fact is that some professional PDR technicians can remove dents without even touching the outside of the car! They use specialized tools to access the back of the panel and massage the metal back into shape from the inside. This requires a high level of skill and precision, but it can produce amazing results.
Finally, did you know that some people believe that you can use a toilet plunger to remove dents from your car? While this might sound like a joke, it's actually a legitimate technique that can work on certain types of dents. The key is to use a cup plunger (not a flange plunger) and to apply firm, steady pressure.
Step-by-Step Guide: How to Repair a Minor Dent with a Hairdryer and Compressed Air
The target is to provide readers with a detailed, easy-to-follow guide on how to repair a minor dent using the hairdryer and compressed air method. This includes step-by-step instructions, photos, and tips for success.
Ready to give the hairdryer and compressed air method a try? Here's a step-by-step guide:
- Clean the area: Thoroughly clean the area around the dent with soap and water.
- Heat the dent: Use a hairdryer to heat the dent for several minutes. Hold the hairdryer a few inches away from the surface and move it around in a circular motion.
- Apply compressed air: Quickly spray the heated area with compressed air. Hold the can a few inches away from the surface and spray in short bursts.
- Repeat as needed: Repeat steps 2 and 3 several times, until the dent pops out.
- Inspect the repair: Carefully inspect the repaired area to ensure that it's smooth and even.
If the dent doesn't pop out after several attempts, try using a different technique. Remember, patience is key! Don't get discouraged if your first attempt isn't perfect. Keep practicing and you'll eventually master the art of DIY dent repair.
What If My DIY Dent Repair Fails?
The target here is to address the possibility of failure and provide readers with alternative solutions. This helps manage expectations and provides reassurance that there are still options available even if the DIY approach doesn't work.
Let's face it, not every DIY dent repair attempt is a success. Sometimes, despite your best efforts, the dent just won't budge. So, what do you do if your DIY repair fails?
First, don't beat yourself up about it! Dent repair can be tricky, even for professionals. Second, don't try to force it. If you've tried several different techniques and the dent is still there, you're likely better off seeking professional help. Trying to force the dent out can easily lead to further damage.
A professional body shop has the tools and expertise to handle even the most challenging dents. They can assess the damage accurately and use the appropriate techniques to restore your car to its original condition. While it might cost more than a DIY repair, it's often the best solution in the long run. Plus, you'll have the peace of mind knowing that the job was done right.
Top 5 DIY Dent Repair Mistakes to Avoid
The target of this section is to prevent readers from making common mistakes that can worsen the damage or compromise the repair. This helps readers approach the DIY project with caution and awareness.
To increase your chances of success, here are five common DIY dent repair mistakes to avoid:
- Using the Wrong Tools: Using the wrong tools can damage your car and make the problem worse. Always use the appropriate tools for the job.
- Applying Too Much Force: Applying too much force can stretch the metal and create new dents. Work slowly and carefully.
- Ignoring Paint Damage: If the paint is cracked or chipped, a DIY repair might not be possible. Consult a professional.
- Working in Extreme Temperatures: Extreme temperatures can affect the way the metal responds to repair techniques. Avoid working in direct sunlight or in freezing temperatures.
- Giving Up Too Soon: Some dents require multiple attempts to repair. Don't give up too soon! Be patient and persistent.
By avoiding these common mistakes, you can significantly increase your chances of a successful DIY dent repair. Remember, preparation is key! Take the time to research the different techniques, gather the necessary tools, and plan your approach carefully.
Question and Answer Section
Q: What kind of dents are suitable for DIY repair?
A: Minor, shallow dents without creases or paint damage are the best candidates for DIY repair. Think of those annoying little dings you get from shopping carts.
Q: What tools do I need for DIY dent repair?
A: Some common tools include a plunger, hairdryer, compressed air, dent puller kit, rubber mallet, and clean cloths.
Q: Can I use dry ice to remove dents?
A: No, using dry ice is generally not recommended as it can be ineffective and potentially damage your paint.
Q: What if I damage the paint during the repair?
A: If you damage the paint, you'll likely need to consult a professional body shop for paint repair.
Conclusion of DIY Dent Repair: A Guide to Minor Dent Fixes at Home
DIY dent repair can be a rewarding and cost-effective way to fix minor imperfections on your car. By understanding the limitations of DIY, using the right tools and techniques, and taking the necessary safety precautions, you can significantly improve your chances of success. However, it's important to remember that not all dents are created equal. If the dent is complex, has sharp creases, or has damaged the paint, it's always best to consult a professional body shop. With a little knowledge, patience, and practice, you can confidently tackle minor dents at home and keep your car looking its best. Remember to research the specific dent, and consider your abilities before committing to a DIY repair.
